This blog is part of a series of blogs that will help with different aspects of using A2X. One is on Connecting A2X to Amazon. The other is Why the A2X Accounting app can be an Amazon Seller’s Best Friend.

In this article, you’ll learn:
- What is A2X?
- How to connect A2X to QuickBooks online: Step-by-Step Guide
- RECAP: Connecting A2X with QuickBooks
Let’s get into it.

Key Takeaways
- A2X Automates Ecommerce Accounting
- Customizable Transaction Mapping
- Admin Access Required
- Setup Includes Bank and Credit Card Info
- Refresh and Disconnect Options
What is A2X?
A2X is an App that makes things easier for companies who use accounting solutions like QuickBooks Online or Xero and sell on Amazon. It automatically pulls in your Amazon settlements and processes the data, creating a summary of revenue, expense, and other transactions. A2X also posts summarized transactions to the accounting software. It generates invoices or journal entries from each settlement and posts them to your QuickBooks Online system. It can do this automatically or manually. You can choose the accounts and tax rates that apply to each Amazon transaction type. You can then easily reconcile A2X settlement postings when the settlement payments from Amazon appear in your bank account. For more info click here.
To see how using A2X will make your life simpler, watch the video below.
So, if you are reading this you’ve already created a shell company in A2X. (If not, then you need to do that first). Okay, let’s go through the step-by-step process of how to connect QuickBooks to A2X.
(For more info on QuickBooks integrations, including A2X click here.)
Connecting A2X to QuickBooks Online
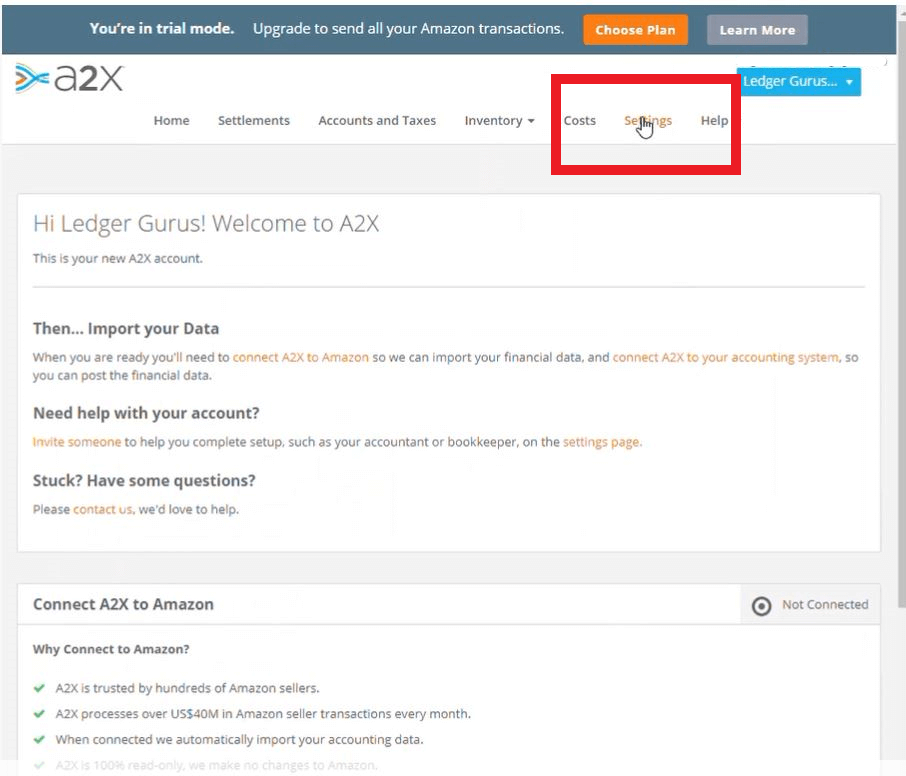
STEP 1: Go to A2X Homepage
As of yet you haven’t connected anything, so we first visit the main homepage for A2X,

STEP 2: Two Ways to Start the Process
Option 1: Connect directly through the A2X Home Page. (All your connected systems should be listed).

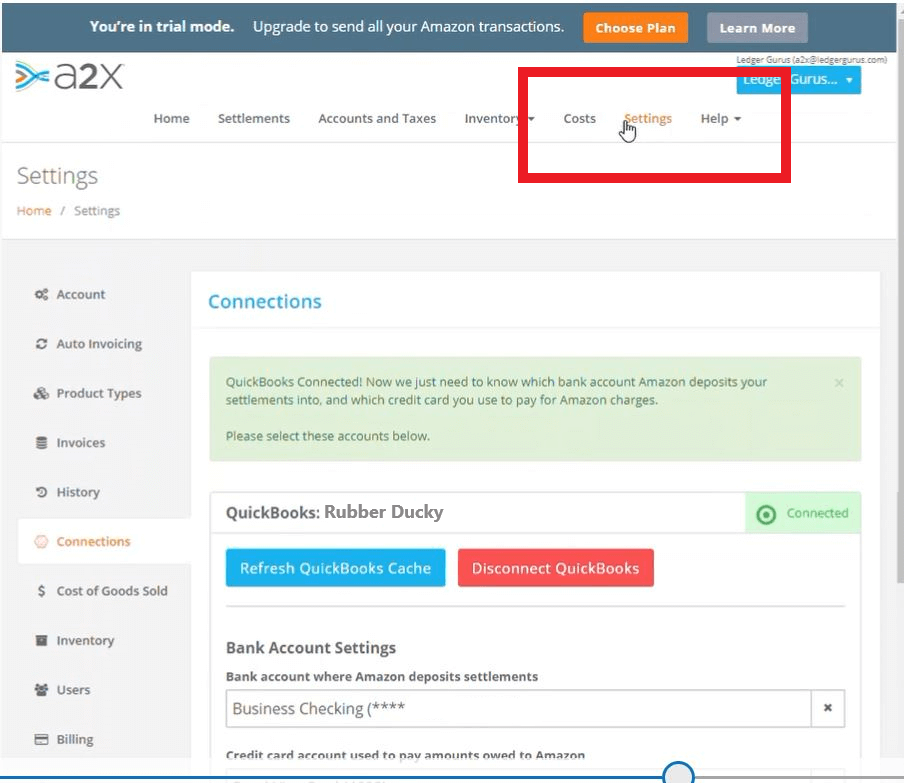
Option 2: Connect through Settings:
Click on “Settings”
 then click “Connections”
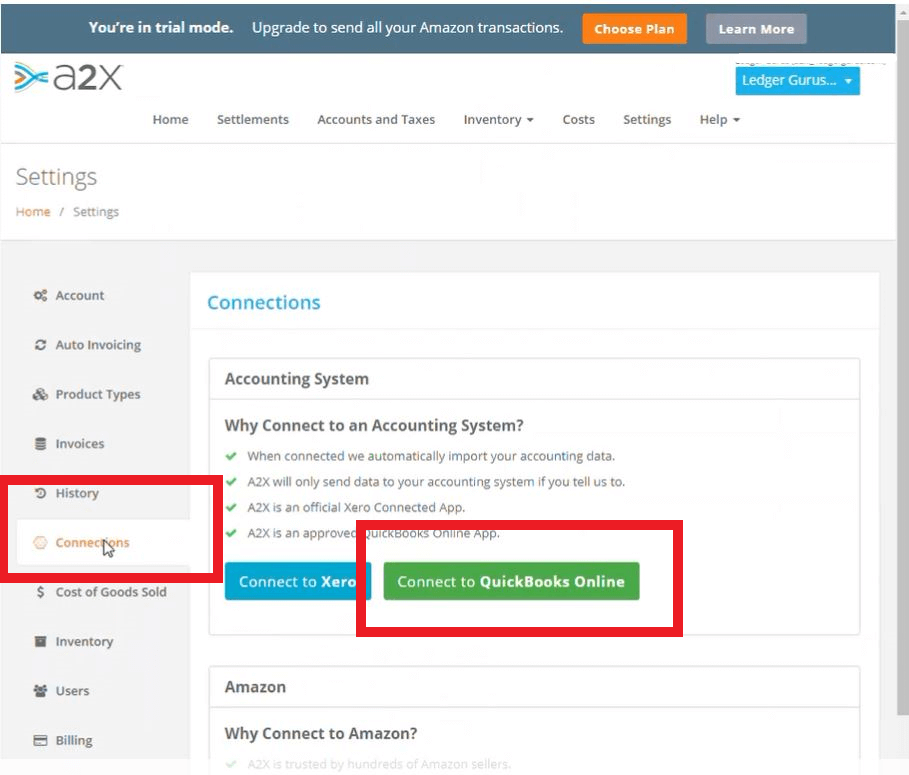 next click “Connect to QuickBooks Online”
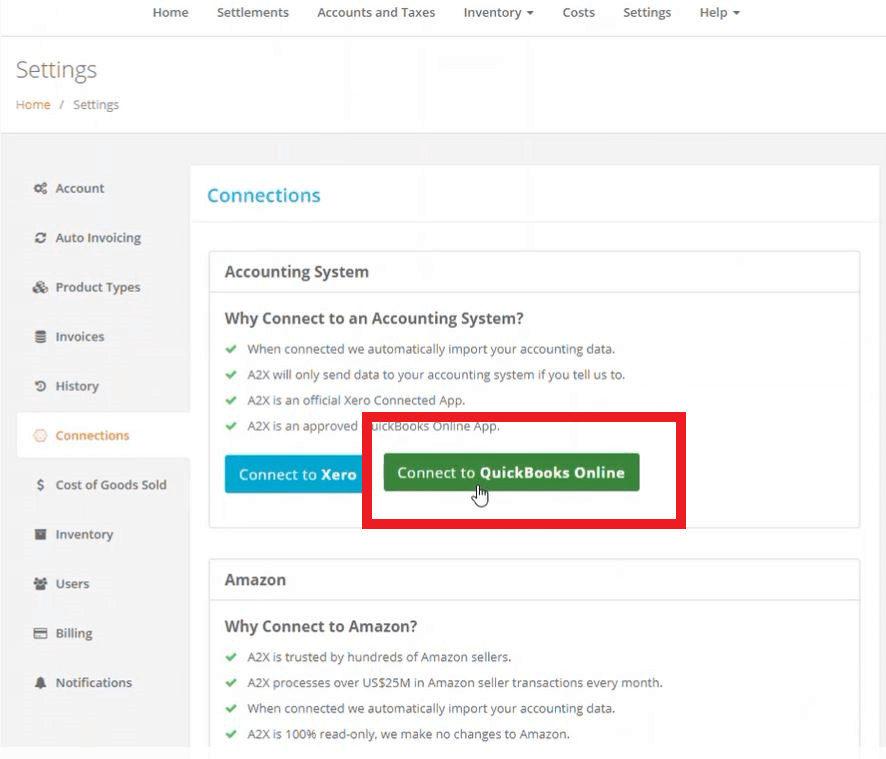
Now follow the rest of this process for both Option 1 & Option 2
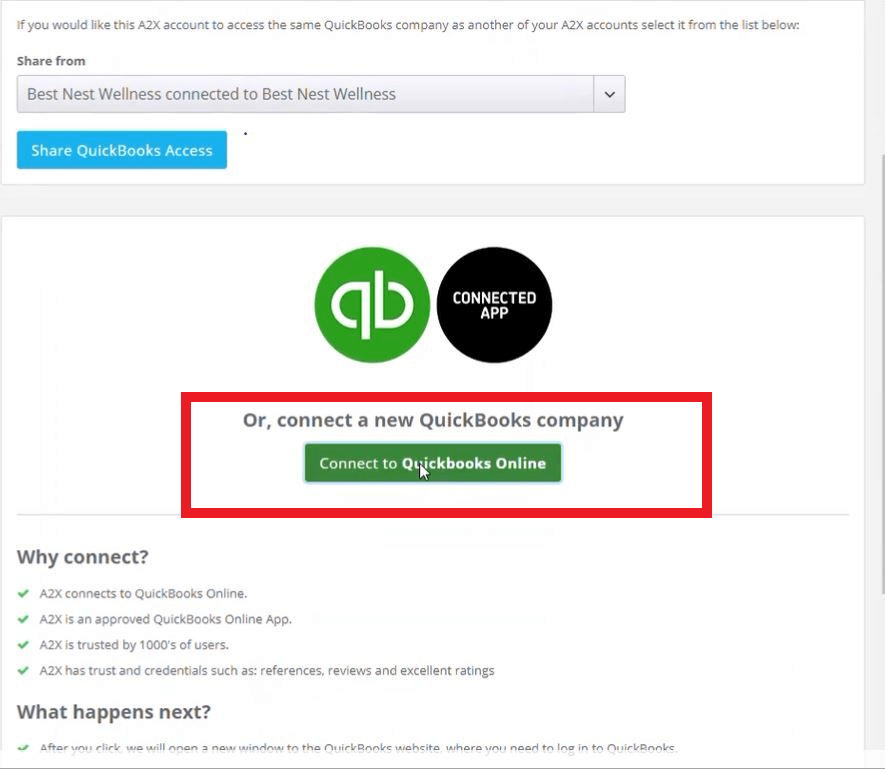
Then click on “Connect with QuickBooks”
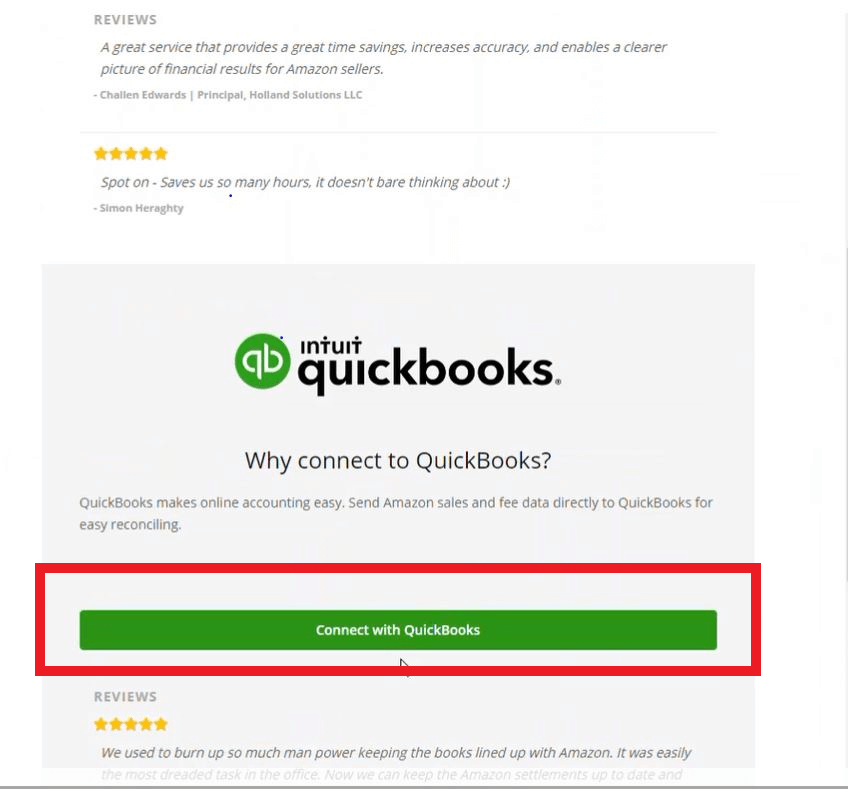
And again click “Connect to Quickbooks Online”
Step 3: Log In
If you are not logged in already, then you will be prompted to put in your login information. In the upper right-hand corner it says “Rachel”. Because she has already logged into A2X; It brought it up for her automatically.
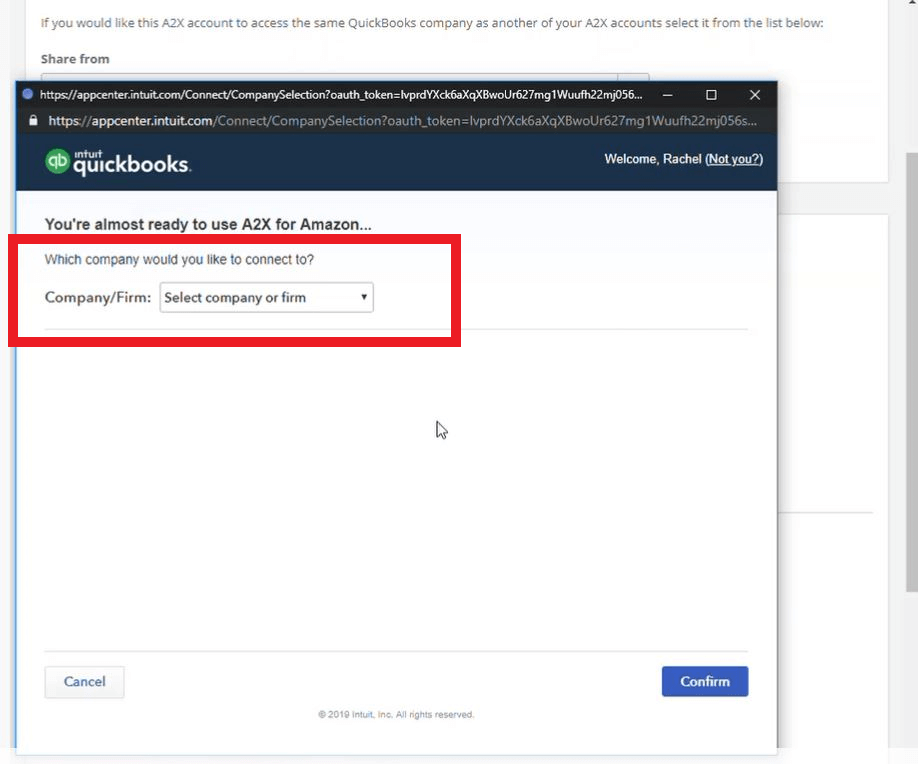
STEP 4: Connect to Company or Firm
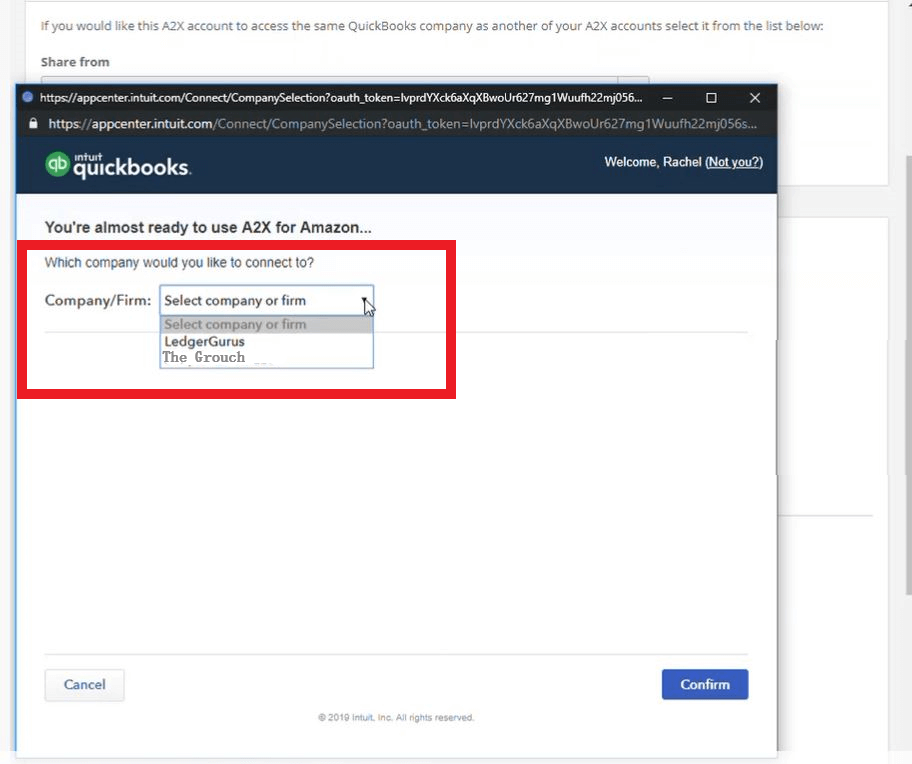
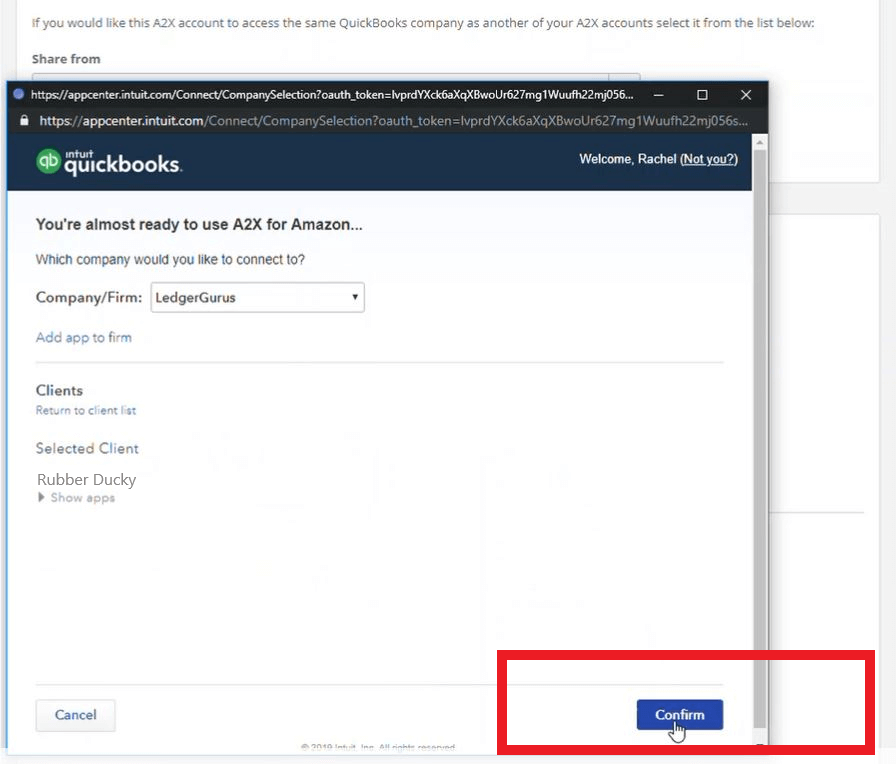
From drop down menu choose the company or firm you want to connect to. As an example we will choose “Ledger Gurus“.
STEP 5: Connect to Client
Next, choose which client you want to connect to A2X. We will use the client “Rubber Ducky” as our example, so here we click on “Rubber Ducky”.
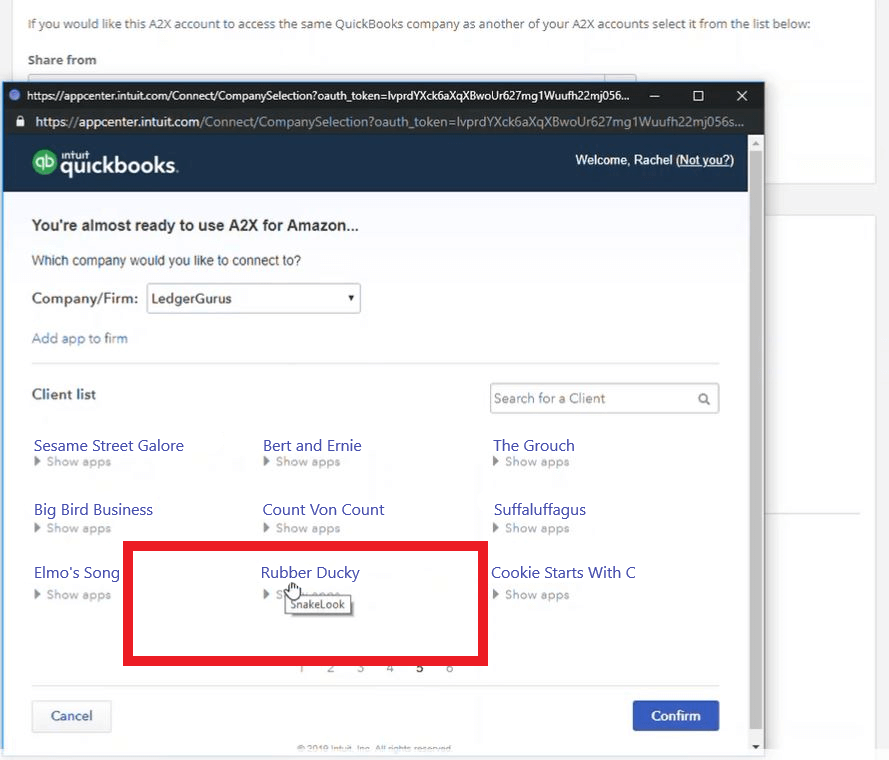
STEP 6: Confirm Choices and Complete Connection
Next click “Confirm“
Then click “Connect” again

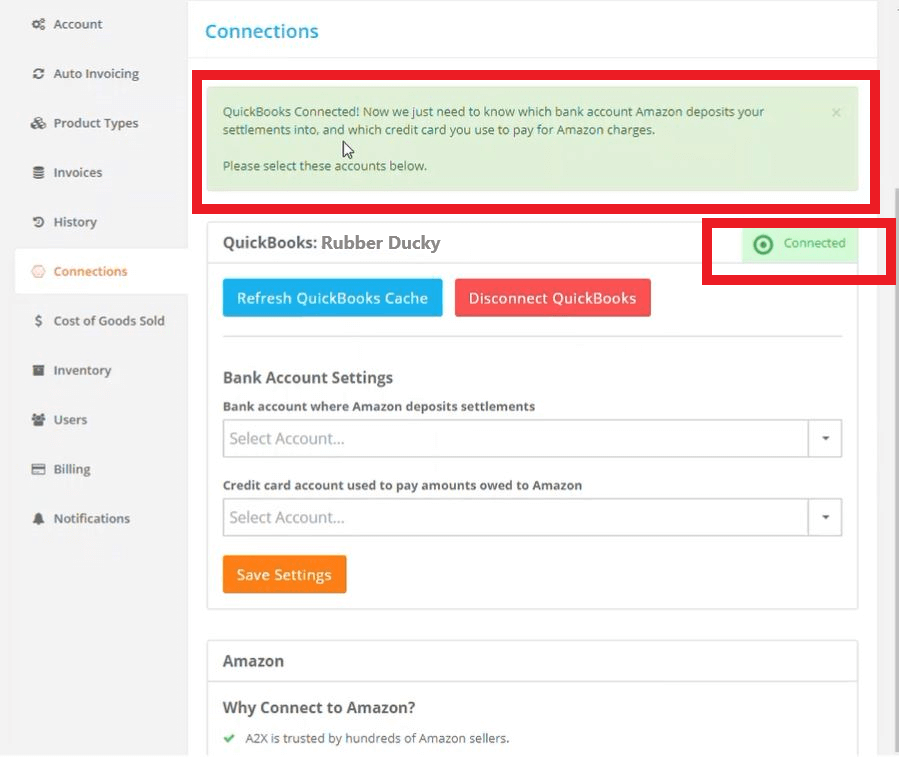
Now we can see that QuickBooks is successfully connected:
If you try to connect a QuickBooks account to A2X, and you’re not the admin on the account, a warning will pop up that looks similar to this one:
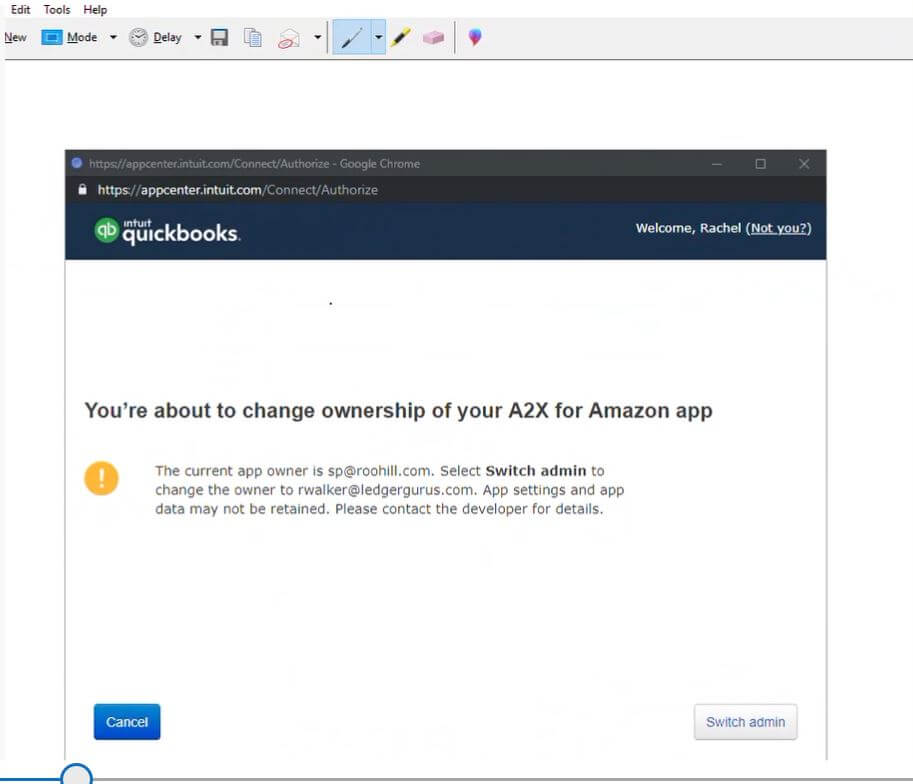
It is important to be an admin for the QuickBooks account you are using. If you are not an admin, the above message will pop up. You would need to click “Switch admin” to connect A2X to QuickBooks, which you may not want to do.
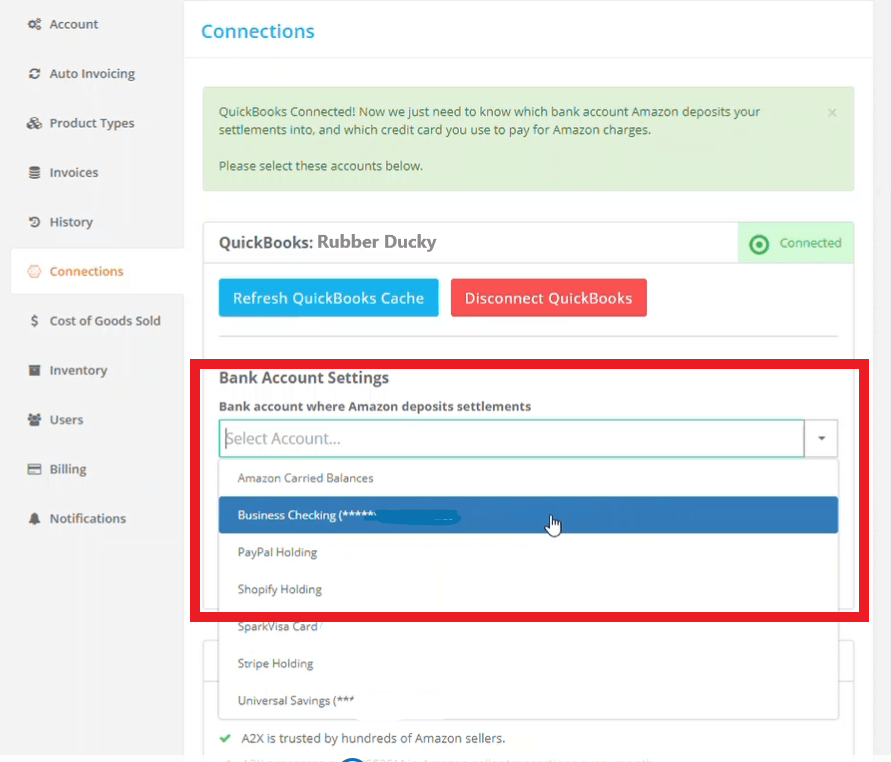
STEP 7: Select Bank Account Where Amazon Deposits Settlements
So here we are, we are the admin on this QuickBooks account and we’ve connected it to A2X, and now it wants some information from us.
First of all, A2X wants to know, based on reports that Amazon compiles every two weeks, where those deposits are going to be sent and which checking account is going to receive that deposit. It’s usually the business checking account so we will use that account in this example. It also wants to know if there are deficient funds in your Amazon account.
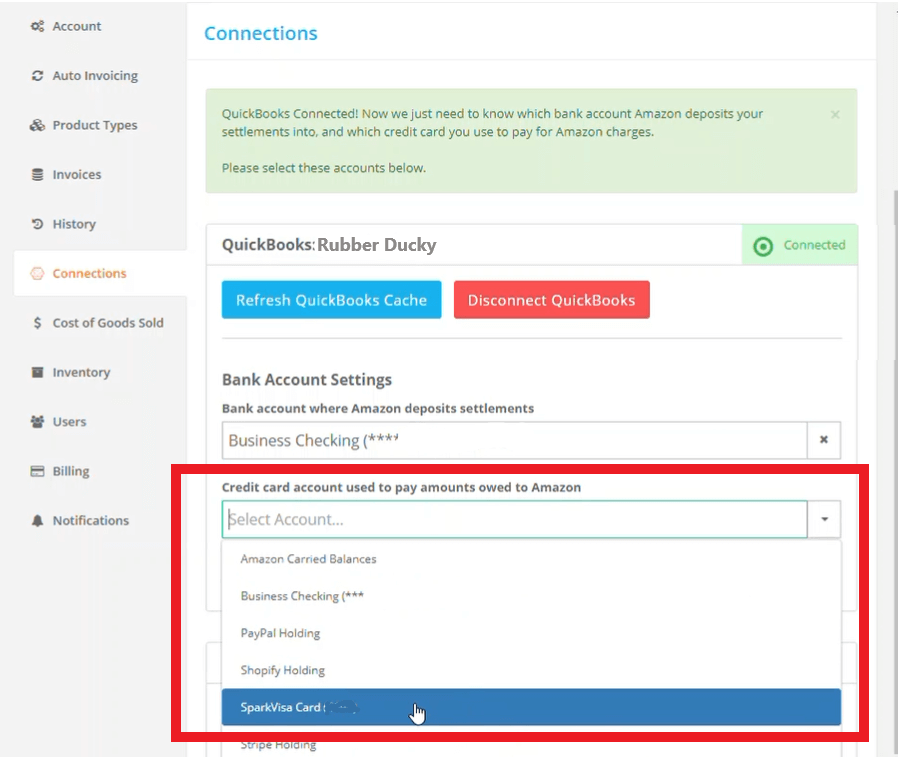
STEP 8: Select Credit Card Account Used to Pay Amounts Owed to Amazon
For instance, if somebody wants a refund, or they charge you your monthly fee for Amazon and you don’t have enough funds sitting in your Amazon holding account to cover that, Amazon still wants its money right now. Amazon isn’t going to wait for you, so it’s going to pull what you owe directly out of a credit card that you specify to cover the difference.
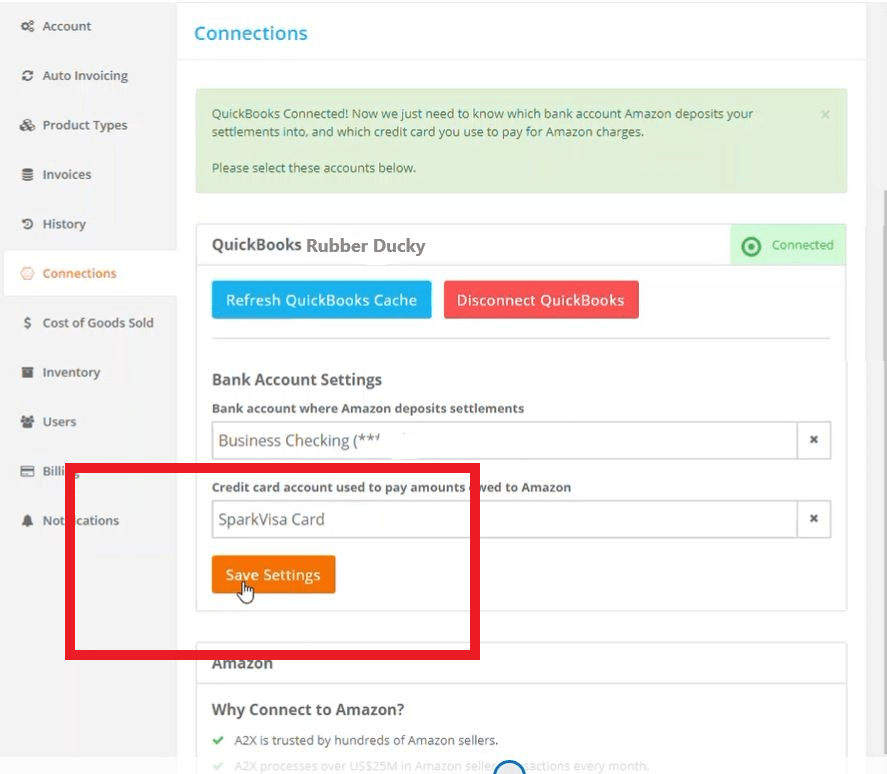
So now that we have specified these settings, click “Save Settings“
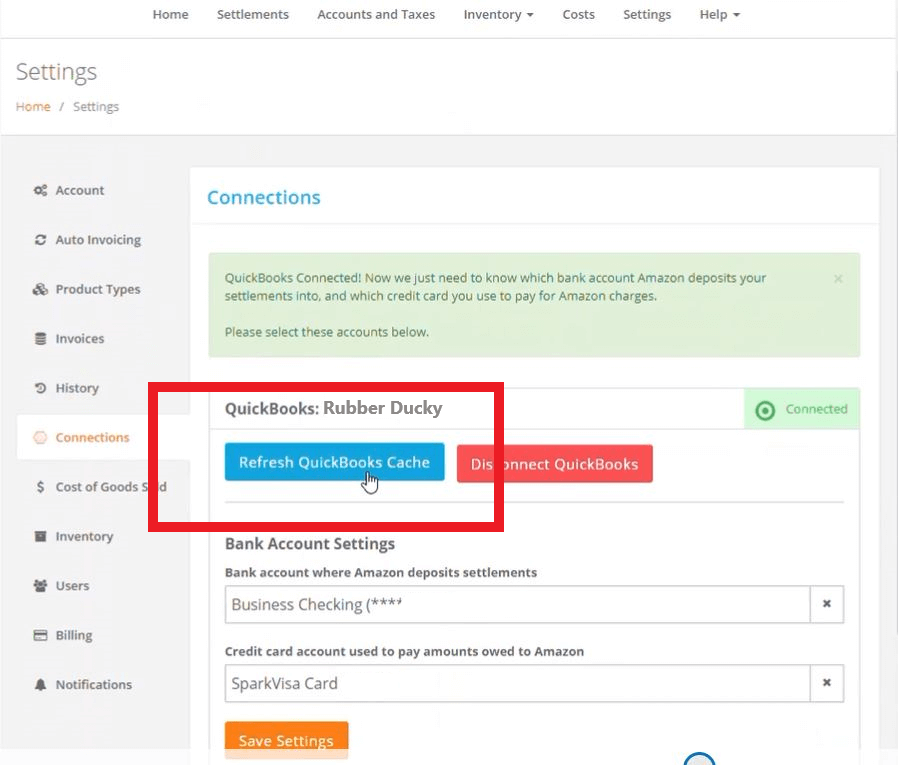
Refresh Cache
If for any reason you have connected the Quickbooks client to A2X and you’ve changed something in QuickBooks, then there is a way to refresh your cache. (For instance, changes to account names in the chart of accounts). Refreshing your connection to Quickbooks makes it possible for A2X to pull in the correct chart of accounts that you’ve updated.
Once again you would go to “Settings“
Next, under the connections tab you click “Refresh QuickBooks Cache“.
Then it would come up with a message saying something like “Refreshing QuickBooks Cache, this will take a minute”. It could take 30 seconds, it could take an hour. It depends on how much data is being changed.
Disconnect QuickBooks
If you want to disconnect from QuickBooks click “Disconnect QuickBooks“. (Next to the “Refresh QuickBooks Cache” button).
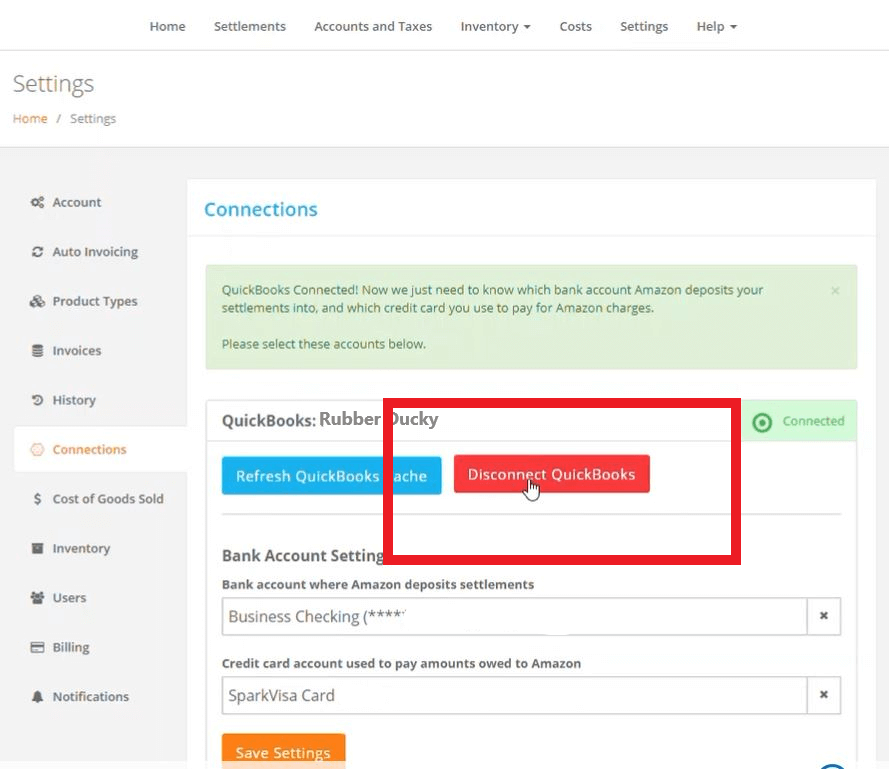
This is helpful if there are multiple QuickBooks accounts and the account currently connected to A2X isn’t the one you want connected.
Afterwards, a message will pop up saying something like “your A2X account has now been disconnected from QuickBooks.”
Now you can cancel out of that window (you don’t want to connect again, because you don’t want this account to be connected to that QuickBooks account.)
Now you are ready to connect another QuickBooks account to A2X.
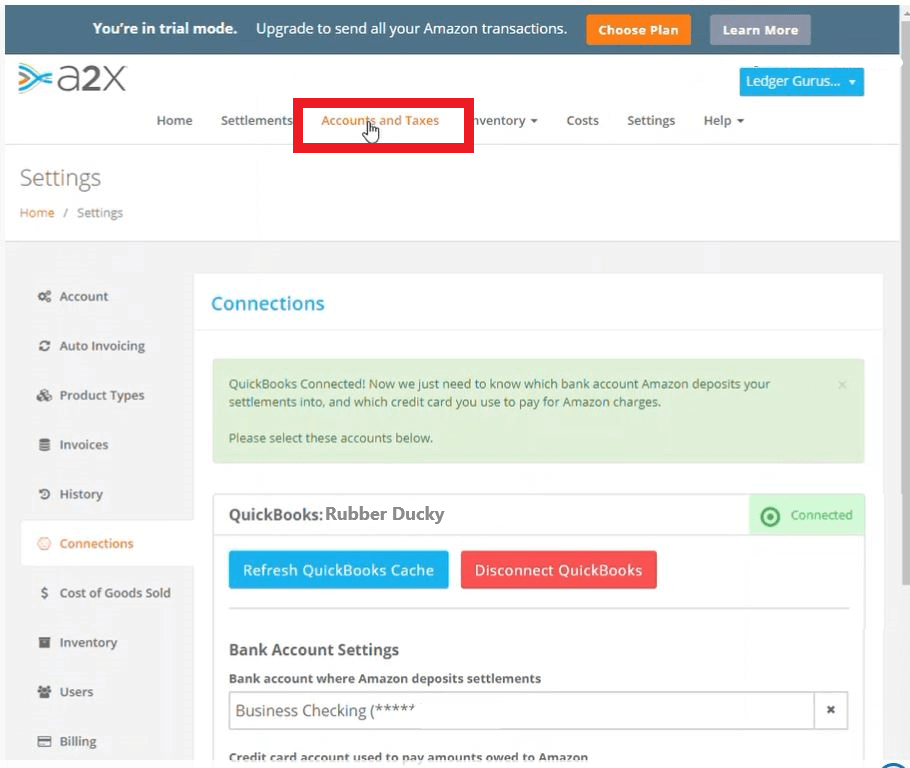
Mapping Amazon Categories and Transactions
Now when it comes to A2X, it’s going to pull in your chart of accounts and we will find that information here under “Accounts and Taxes”.
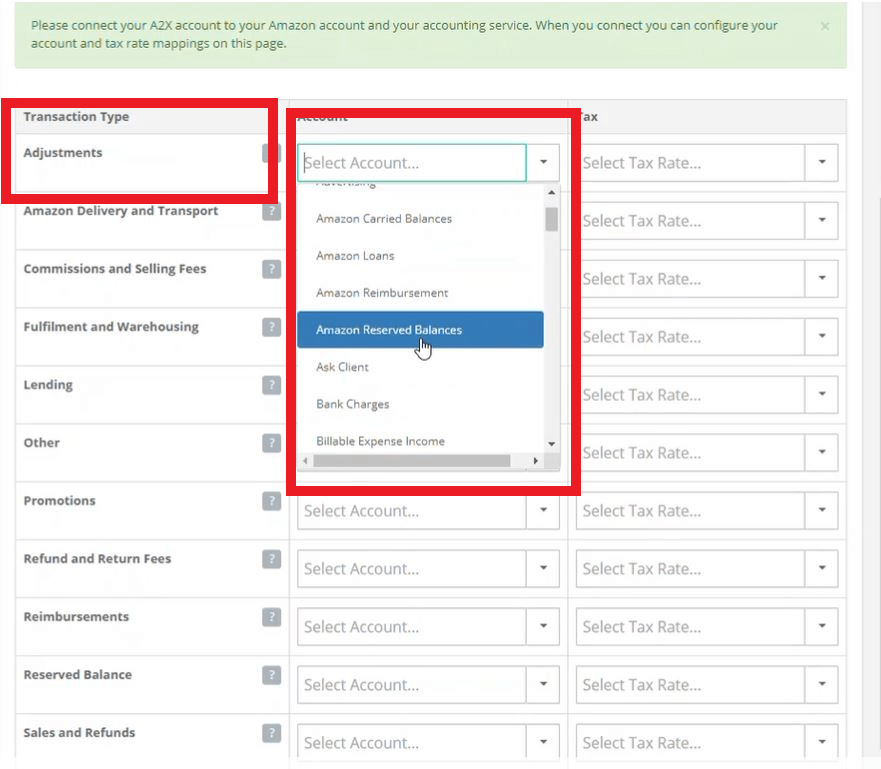
 So these are the different types of categories/transactions that Amazon will pull over.
 And once we pull over our example chart of accounts, we can use the drop down menu to choose which account to save transactions to. For example I could assign “Adjustments” to the account called “Amazon Reserved Balances” (this is not the correct account for adjustments, we are using this as an example).
It’s helpful to know that this is what is happening behind the scenes, although this article will not cover mapping in depth.
RECAP: Connecting A2X with QuickBooks
So, we set up a shell account in A2X before connecting A2X and QuickBooks. Then follow the steps (whether or not we connect directly through the homepage or settings) to connect A2X to Quickbooks:
- We select a Bank Account where Amazon deposits settlements
- We select a credit card account used to pay amounts owed to Amazon
- To view any changes or updates that you make, follow the steps to refresh you QuickBooks Cache
- If you have connected to the wrong account, then follow the steps to disconnect and connect to the correct account
If You’d Rather Not Do This Yourself
If you’d rather not do this process yourself and you’d rather have the professionals do it instead, you’re in luck! We have a service doing exactly this. We can connect your Amazon store to your A2X account, and then connect that to your QuickBooks Online account. This will make your ecommerce accounting so much easier.
Whichever way you decide to go, though, using A2X with QuickBooks can help make your life easier by automating your Amazon accounting.